Hello hello everyone!
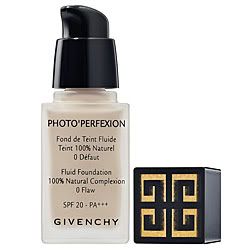
So this is gonna be a review for the Shiseido Dual Balancing Foundation ^^~ I am gonna include a comparison with the Givenchy Photo'Perfexion Fluid Foundation because I feel like the two are very similar :)
Before I start I just want to let you guys know I always look for very very liquidy foundation because 1. watery foundation is easier to work with, whether you're using fingers or stipling/foundation brushes (leaves least streak marks) 2. watery foundation is less thick 3. have better moisturizing effect :)
So if you don't like watery foundation... you can skip this post :P
Now I don't own this foundation, but I got a sample and I've been using it for almost 2 weeks.
Here it goes! =)
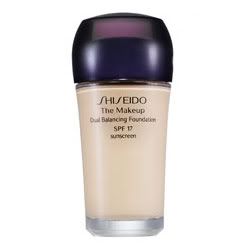
Volume: 1 oz.
Price: $38.5
SPF: SPF 17
Finish: matte
So at Nordstrom, you can ask for this little jar to store your samples (instead of having to keep them into little packets which sucks to use)
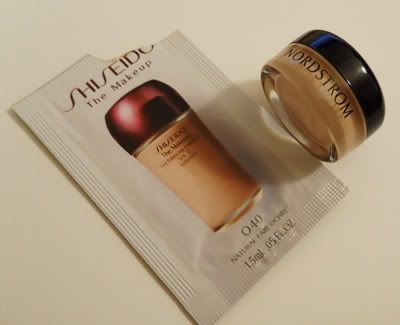
*keep the packet so you can keep the shade number! or you can just label the jar lol!
* I like to use samples first before I purchase :) because I don't like to open a brand new product and just return it if I end up not liking it... lol!
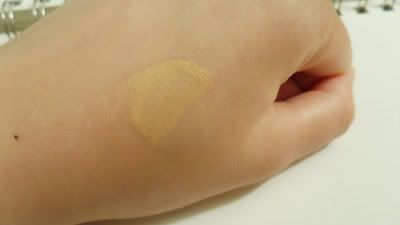
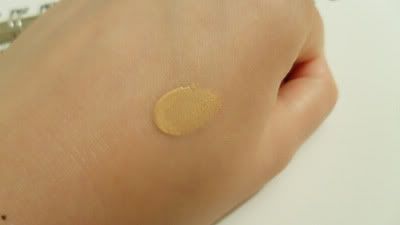
You can kind of tell it's very watery consistency =)
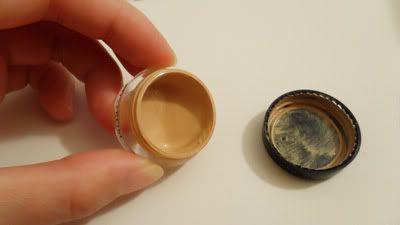
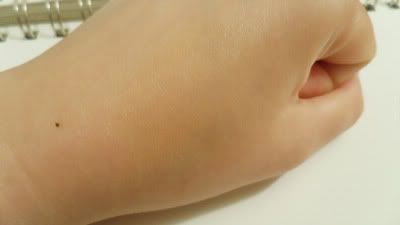
Here are the swatches:
So highlights of this product:
- Glides on like water which I love, blends very easily
- Dual balance? Honestly I can't feel a difference so the oil control isn't great
- Medium coverage
- Doesn't smell like anything (which is good cuz some foundations smell funky...)
- Looks a bit powdery????? Not obvious, kind of like how you would look a little bit polished from using any other foundation... but I happen to notice it more because I was switching between using this and Givenchy... so I'd say the finish looks a bit more powdery COMPARED to Givechy.
Now onto Givenchy:
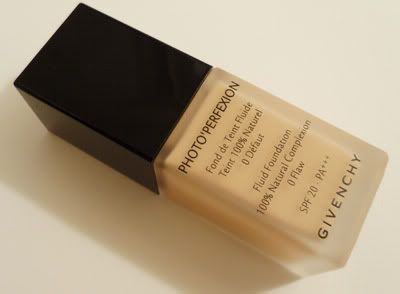
Volume: 0.8 oz.
Price: $44
SPF: SPF20 PA+++
Finish: Dewy
As you can see Givenchy has less product and a lot more expensive T口T
Highlights of this product:
- Glides on like water and blends really well
- Medium coverage
(that's why I said Shiseido is really comparable to Givenchy lol!! the consistency is almost the same, so is the coverage
- Smells amazing... very Givenchy XD the best-smelling foundation ever used
- Awesome pump that has perfect control over the amount (sorry I can't tell you about Shiseido cuz I don't have it)
- Major drawback for me: all the shades I have tried has this orange tint to it :/
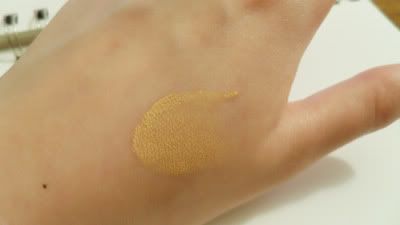
Swatches
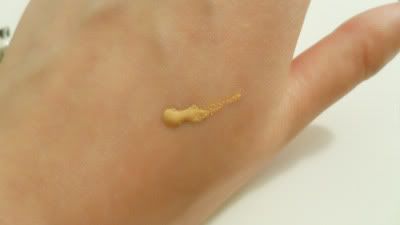
See what I mean about the orange tint?
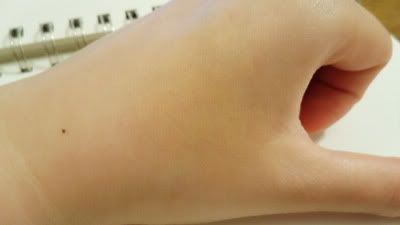
The orange tint becomes apparent when you apply it on bigger areas... especially for me I don't use foundation all over my face, just on areas where I need some coverage, and the tint really makes my face look more orange than other areas where I didn't apply foundation. For this reason I always have to apply the whole face when I use Givenchy :(
My final verdict:
I love the Givenchy formula but I hate the shade (orange tint). I love the Shiseido shade but the formula is not as good. Also The dual balance control doesn't really have any effect on me (I didn't notice any difference between oiliness when I use Givenchy or Shisedo) and for me that should be the selling point of this Shiseido foundation. But aside from that I like Givenchy foundation better because I think Givenchy has finer particles? When I get oily the foundation still looks good, like I would look dewy instead of oily, and it doesn't really cake. But the Shisedo one cakes up just a little bit. Givenchy one I can pull off the day without touching up, but with Shisedo, the slight cakeyness makes me want to touch up.
And finally...
Givenchy smells AMAZING XD
*** BTW I ALWAYS SET MY FOUNDATION WITH POWDER, SO THE EFFECTS I TALKED ABOUT IS COMBINED WITH THE EFFECT OF LOOSE POWDER AS WELL, NOT JUST SINGLE USE OF FOUNDATION!!
It just really sucks that Givenchy has that orange tint... if I can have the Shiseido shade but Givenchy formula... it would be perfect... /__\
Hope you guys find this helpful~ :)
<3 Frances
About Me
- Frances
- California, United States
- Hi! Thanks for visiting ^_^ My social media platforms: Instagram: meowmier Youtube: http://goo.gl/U5SnNM (formerly under the username francesvlogs but I don't have access to that anymore). I don't really do videos anymore simply because I think blog posts are more informative. Hope you enjoyed your time here! :)
Tuesday, June 29, 2010
Foundation Application
Hi there!
So I sum up a few ways you can apply your foundation... hopefully this will help you choose the perfect method for the perfect look :)
I'm starting to do the highlighting thing for people who don't want to read everything :) hopefully it'll make the reading process easier XD
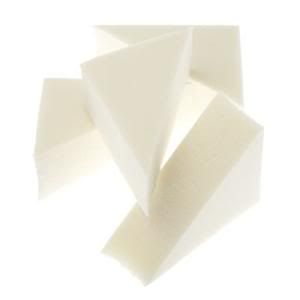
1. Wedged sponges
** Always wet your sponges before you use them!!
Pros: This application gives you very even and natural coverage, and the wedges allow you to get into everywhere on your face :) a very friendly application, I recommend beginners to start out with sponges because you can't really go wrong with them, and they're super cheap :)
Cons: Not very eco-friendly obviously... because you just throw them away after application. You guys might think I'm crazy but I think it is something to be considered. Secondly, sponges absorb too much product. Although you already wet them to prevent them from absorbing too much, they still eat up a lot of the product.
2. Foundation brush
Pros: I think this application "waste" the least product, because foundation brushes don't absorb much product. And if you have a good foundation brush, the application will be very even and natural as well. However, if you don't have a good foundation brush, it's very likely that you'll have streak marks on you (A good foundation brush in my opinion has to be thick, because it needs to have enough fine hairs to get every inch of your face, leaving no space between streaks. In other words, if you're looking at a very thin foundation brush, it is likely to leave streak marks. Also having very fine and soft bristles is very important too cuz that will reduct the streakiness. A good foundation brush I've used is from Sephora professional line). It is important to do some homework on foundation brushes before you randomly buy one because they're pretty expensive, you don't want to burn a hole in your pocket. However, I feel like foundation brushes are only good for using moist foundation (preferably watery ones) ; if the foundation is relatively dry, it is a little hard to work with. But you can always wet your foundation brush if your foundation is too dry to work with, that'll help :)
Cons: Streak marks.
3. Stippling brush
Pros: You can get the so-called the air-brushed effect by stippling foundation on... or that's what they say. To be honest with you guys, I can't tell the difference XD but thought I'd just throw it out there, in case you guys actually notice a difference.
Cons: You need more time and patience for this method, since it could take a while to stipple your whole face (since I'm so lazy... not my favorite to apply foundation XD haha). Also, I would highly suggest buying a smaller stippling brush, like for example, a size like MAC 130 or 188 (Not saying you should buy MAC! Just giving you an idea of the size of the brush, although MAC stippling brushes are better than the Sephora ones in my opinion-- they're softer). I have a MAC 187, and I found that when I'm applying my nose area, the big stippling brush just cannot get into the smaller corners, thus leaving a very uneven application-- I always have to use my fingers to blend it out. So I recommend getting a smaller stippling brush if you're thinking about buying one :)
4. Last but not least... your fingers of course lol!
Pros: Your fingers can warm up the foundation, thus is very good for blending.
Cons: Applying foundation using fingers is more heavy. This is not a bad thing if you want a good coverage. I don't normally like heavy coverage so I prefer using sponges or foundation brushes. However, if I want to use foundation to conceal, I love using my fingers.
*** You can also put the foundation on the back of your hand, and use one or two fingers to rub on the foundation in circular motion on the back of your for a little bit, then use the foundation on your fingers for a lighter application :)
And I think that's it! Did I leave out anything!?!?!?!?????!?!?????!?!?!?????? I hope not lol!
Hope this is helpful :D
Makeup brushes are pretty expensive... so if you can't afford them, I'd say just go ahead and try out the sponges, cuz I think they work wonderfully :)
<3 Frances
Monday, June 28, 2010
Foundation reviews
Hi hi!
So this is a comprehensive review I did a while back... but I updated some info so I thought I'd repost it :) All the foundations I've used/owned :D
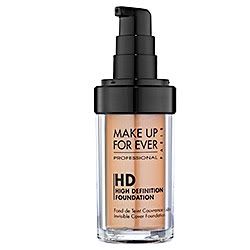
1. Make Up For Ever HD Foundation
Price: $40
Volume: 30ml or 1.01 fl. oz.
Finish: matte
Pros:
- Spectacular range of shades! I think they have 24 shades with different tones, like peachy/rosey or more yellow undertone.
- Very good coverage. Buildable but will look too heavy if you apply too much.
- stays well for me ** However I know a lot of gurus said this foundation has horrible staying power
Cons:
- The pump SUCKS. It's like a "all-or-nothing" pump (haha reminds me of neuron firing... uhhh sorry... nerdiness kicking in again)... sometimes I just need a little bit more to touch up but the pump just doesn't allow me to do it... it'll just squirt out another pump of foundation that is enough for another face application :( if they fix the pump I think it's perfect.
- A little bit dry to work with, so if I'm using a foundation brush I always have to wet it first. But this foundation is great using your fingers cuz it really helps with blending (however using fingers gives you thicker coverage).
Will I go back to buy it?: No. I only use this foundation for tutorials, and occasionally for night-outs, because this foundation for me is too thick for every day use, and it actually breaks me out. So I figure 40 bucks is not worth it ^^;;
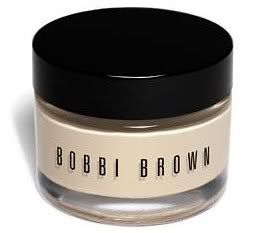
2. Bobbi Brown Smooth Skin Foundation
Price: $40 (Although I got mine at The Cosmetics Company Store for $28)
Volume: 30 ml or 1 fl. oz
My shade: Biege 3
Finish: matte
Pros:
- Easy to blend
- Natural coverage
Cons:
- I HATE the packaging! I feel like it's easy to contaminate. If I dip my brush/sponge in it then it's too much, so I'll always have to wipe my brushes on the back of my hand to get the excess off.
- I don't really like it cuz it just looks powdery on my face...
- It does slip and slide, so you will need to set it with powder
Will I go back to buy it?: Nope! (But I'm willing to try other Bobbi Brown foundations that have pumps :P)
My shade: I got it in 23 which was a mistake, I should've got #21
Finish: matte
Pros:
- Good coverage
- Smells really nice!
- It's supposed to have skin benefits that help heal your blemishes while you wear it... which totally doesn't work for me cuz it makes me break out (so ironic haha).
Cons:
- Feels heavy on my skin.
- If I use my fingers to apply it, it makes my pores look HUGE. So I have to use sponge or stippling brush.
- For this specific line, there are only 2 shades.
Will I go back to buy it?: Nope! (Although I know a lot of people rave about this...)
4. Givenchy Photo'Perfexion
Price: $44
Volume: 25ml
My shade: Perfect Honey
Finish: Dewy
Pros:
- Most moisterizing foundation I've used so far.
- Dewy finish makes my skin look super healthy :)
- Smells AMAZING! You can totally smell the Givenchy-ness ;)
- Sheer coverage (if you're looking for super good coverage this is NOT for you). But it's buildable!
- I LOVE the pump!!!! You have 100% control over the amount you want. If all the pumps are like this... sigh.
Cons:
- I've tried it in Perfect Gold (for medium olive complexions with neutral undertones) and Perfect Honey (for medium complexions with yellow undertones) and for some reason they all in my opinion have an orangey undertone... even when it's supposed to be yellow or neutral.
Will I go back to buy it?: If I don't find another foundation that is as good then yes (cuz it's $44 for 25ml -___- so pricey!) I think it's a great foundation for everyday because it's sheer and very moisturizing. But I need to find a better shade. The people who work at Sephora aren't very helpful =_=
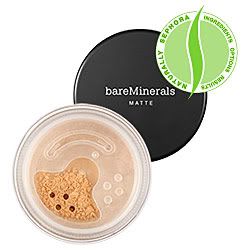
5. bareMinerals SPF 15 Matte Foundation
Price: $28
Volume: 6g or 0.2 oz
My shade: 1G, light
Finish: matte
Pros:
- Has natural ingredients :)
- Good coverage
- This is actually my go-to product... because usually I just need coverage for the redness around/on my nose, and it's just really easy and fast to use, plus it absorbs excess oil off my nose XD Not so well for the rest of the face though.
Cons:
- Doesn't stay on well for the rest of the face
- Will look uneven if your face gets oily by the middle of the day
- I also want to add if you want to mix this foundation with lotion to double it up as a liquid foundation... well this foundation powder doesn't mix very well for me. So I wouldn't recommend it if you're thinking about that.
Will I go back to buy it?: Maybe. But I still have a lot left XD
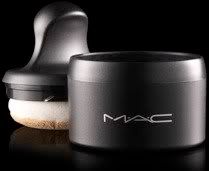
6. MAC Mineralize SPF 15 Foundation/Loose
Price: $29.5 (I got mine at The Cosmetics Company Store for $20.75)
Volume: 8g/0.3 oz
My shade: Light
Finish: Matte
Pros/Cons: I'm just gonna say it's very comparable to the bareMinerals one, except in my opinion bareMinerals is wayyy legit. This MAC one's staying power is not as well, and the coverage is not as good.
Will I go back to buy it?: NO
Please note that it's all my personal opinion :) what works for me might not work with you, or vice versa. I remember I was so excited when I got the B.B cream because a lot of ppl were raving about it... but I honestly don't like it. So you just have to try things out and find something that works best for you.
Right now my favorite would be The Givenchy for every day, because I'm huge on moisturizing.
MUFE is my favorite go-to when taking pictures (contains no SPF).
That's it! Thanks for reading :)
<3 Frances
So this is a comprehensive review I did a while back... but I updated some info so I thought I'd repost it :) All the foundations I've used/owned :D
1. Make Up For Ever HD Foundation
Price: $40
Volume: 30ml or 1.01 fl. oz.
Finish: matte
Pros:
- Spectacular range of shades! I think they have 24 shades with different tones, like peachy/rosey or more yellow undertone.
- Very good coverage. Buildable but will look too heavy if you apply too much.
- stays well for me ** However I know a lot of gurus said this foundation has horrible staying power
Cons:
- The pump SUCKS. It's like a "all-or-nothing" pump (haha reminds me of neuron firing... uhhh sorry... nerdiness kicking in again)... sometimes I just need a little bit more to touch up but the pump just doesn't allow me to do it... it'll just squirt out another pump of foundation that is enough for another face application :( if they fix the pump I think it's perfect.
- A little bit dry to work with, so if I'm using a foundation brush I always have to wet it first. But this foundation is great using your fingers cuz it really helps with blending (however using fingers gives you thicker coverage).
Will I go back to buy it?: No. I only use this foundation for tutorials, and occasionally for night-outs, because this foundation for me is too thick for every day use, and it actually breaks me out. So I figure 40 bucks is not worth it ^^;;
2. Bobbi Brown Smooth Skin Foundation
Price: $40 (Although I got mine at The Cosmetics Company Store for $28)
Volume: 30 ml or 1 fl. oz
My shade: Biege 3
Finish: matte
Pros:
- Easy to blend
- Natural coverage
Cons:
- I HATE the packaging! I feel like it's easy to contaminate. If I dip my brush/sponge in it then it's too much, so I'll always have to wipe my brushes on the back of my hand to get the excess off.
- I don't really like it cuz it just looks powdery on my face...
- It does slip and slide, so you will need to set it with powder
Will I go back to buy it?: Nope! (But I'm willing to try other Bobbi Brown foundations that have pumps :P)
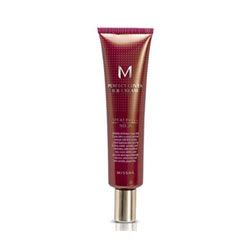
3. Missha Perfect Cover B. B Cream
Price: I can't remember... I got it on e-Bay. I think it was under 15 bucks.
Volume: 30 ml
Finish: matte
Pros:
- Good coverage
- Smells really nice!
- It's supposed to have skin benefits that help heal your blemishes while you wear it... which totally doesn't work for me cuz it makes me break out (so ironic haha).
Cons:
- Feels heavy on my skin.
- If I use my fingers to apply it, it makes my pores look HUGE. So I have to use sponge or stippling brush.
- For this specific line, there are only 2 shades.
Will I go back to buy it?: Nope! (Although I know a lot of people rave about this...)
4. Givenchy Photo'Perfexion
Price: $44
Volume: 25ml
My shade: Perfect Honey
Finish: Dewy
Pros:
- Most moisterizing foundation I've used so far.
- Dewy finish makes my skin look super healthy :)
- Smells AMAZING! You can totally smell the Givenchy-ness ;)
- Sheer coverage (if you're looking for super good coverage this is NOT for you). But it's buildable!
- I LOVE the pump!!!! You have 100% control over the amount you want. If all the pumps are like this... sigh.
Cons:
- I've tried it in Perfect Gold (for medium olive complexions with neutral undertones) and Perfect Honey (for medium complexions with yellow undertones) and for some reason they all in my opinion have an orangey undertone... even when it's supposed to be yellow or neutral.
Will I go back to buy it?: If I don't find another foundation that is as good then yes (cuz it's $44 for 25ml -___- so pricey!) I think it's a great foundation for everyday because it's sheer and very moisturizing. But I need to find a better shade. The people who work at Sephora aren't very helpful =_=
5. bareMinerals SPF 15 Matte Foundation
Price: $28
Volume: 6g or 0.2 oz
My shade: 1G, light
Finish: matte
Pros:
- Has natural ingredients :)
- Good coverage
- This is actually my go-to product... because usually I just need coverage for the redness around/on my nose, and it's just really easy and fast to use, plus it absorbs excess oil off my nose XD Not so well for the rest of the face though.
Cons:
- Doesn't stay on well for the rest of the face
- Will look uneven if your face gets oily by the middle of the day
- I also want to add if you want to mix this foundation with lotion to double it up as a liquid foundation... well this foundation powder doesn't mix very well for me. So I wouldn't recommend it if you're thinking about that.
Will I go back to buy it?: Maybe. But I still have a lot left XD
6. MAC Mineralize SPF 15 Foundation/Loose
Price: $29.5 (I got mine at The Cosmetics Company Store for $20.75)
Volume: 8g/0.3 oz
My shade: Light
Finish: Matte
Pros/Cons: I'm just gonna say it's very comparable to the bareMinerals one, except in my opinion bareMinerals is wayyy legit. This MAC one's staying power is not as well, and the coverage is not as good.
Will I go back to buy it?: NO
Please note that it's all my personal opinion :) what works for me might not work with you, or vice versa. I remember I was so excited when I got the B.B cream because a lot of ppl were raving about it... but I honestly don't like it. So you just have to try things out and find something that works best for you.
Right now my favorite would be The Givenchy for every day, because I'm huge on moisturizing.
MUFE is my favorite go-to when taking pictures (contains no SPF).
That's it! Thanks for reading :)
<3 Frances
Labels:
bareMinerals,
Bobbi Brown,
foundation,
Givenchy,
MAC,
Missha,
MUFF
Saturday, June 26, 2010
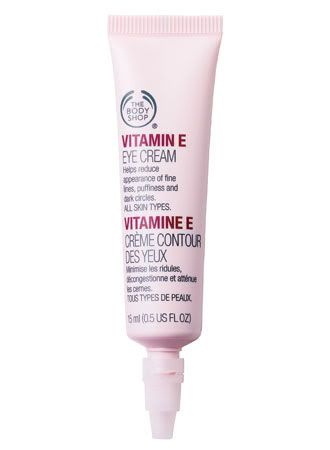
Body Shop Vitamin E Eye Cream Review
Price: $17
What it claims to do:
Helps reduce appearance of fine lines, puffiness and dark circles.
Personally... I have fine lines under my eyes (T^T why~~~ am I THAT old~~)
and I do have dark circles (and eye bags =_=)
I have been using this product for about 5 weeks?
Personally I haven't felt or noticed any difference XD so I guess that means it's not gonna do anything for me.
A little bit disappointed because the lady who works at the Body Shop said she really loves this stuff. Well I guess it's just not for me. It might be because I'm already using high-end skin care products though? (I use Shiseido).
So I will just carry on with my fine lines and dark circles XD (I've always had these fine lines =_= and dark circles... I think only going to bed actually early helps XD). But I will finish using this product :) Just a preventative thing. Will be on the hunt for a better eye cream after I finished this :)
Any one has used a good eye cream????
<3 Frances
Friday, June 25, 2010
Favorite Accessory Tag
Hello there~!
Today's a tag article again XD
This time I was tagged by Elisa, who actually created this tag heehee :P Thanks for tagging me~
Rules:
x Take one picture of yourself with one of your favorite accessory and post it on your blog
x In your post, mention the person who gave it to you
x Tag 5 people
x Let these 5 people know that you've tagged them by leaving a comment on their blog
So... my favorite accessory?
Honestly I'm not a big accessory person XDD ... although I want to be -___-
I always like the heavy accessory look/style... but I'm just lazy -__-;;; and I don't like how bracelets dangle (I've broken a couple cuz they always get caught on something!) or how rings just feel really awkward on my fingers... XD I don't even change my earrings every day 囧
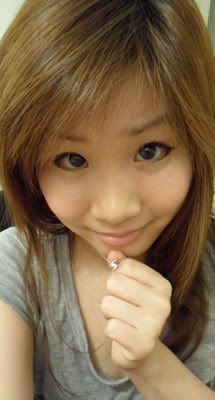
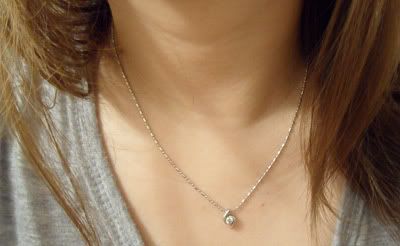
But there is this one necklace that I've been wearing for 6 years ^^~
It's given to me by a my mom's best friend, a non-related "auntie" (like we call the older/ middle-aged woman auntie (阿姨, ah-yi), if it helps you understand better, like "obasan" in Japanese? ^^"). She and I are very close, she's like my second mom and she treats me like her own daughter :) she gave this to me when I moved to the States. So I always wear this because it's special and meaningful to me :)
Other than that...
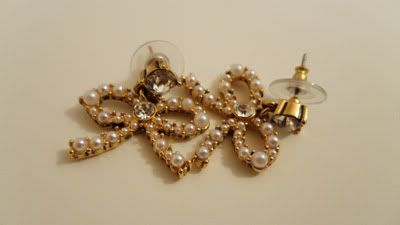
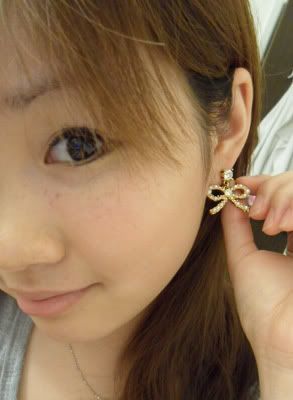
My current favorite earrings will be these... (haha cuz they're my most recent purchase!)
:) that's it!
And I tag!!
1. Bunny
2. Hardcore Makeup Junkie
3. Abby
4. Phoebe
5. projectvee
I try to tag more new ppl... as well as some old ones :P
And if you see this and want to do it... DO IT!! :D :D :D
Have a great weekend guys~ :)
<3 Frances
Tuesday, June 22, 2010
( /。\ ) ...
Okay... so this entry... is just me being whiney... ( /。\ )
So I always wanted a good BB cream... (used Missha Perfect Cover before-- too heavy and breaks me out... ironic huh?! LOL) so I was watching this and I was like OMFG this BB cream looks like it glides on like water and is super light!!!!!! and The effect looks freaking AMAZING!!!
If you don't want to watch the whole thing please fast forward to 2:05 to see the effects.
(The video was basically explaining why BB cream is so popular and how you can use 2 BB creams with different functions on different areas of face to achieve oil control on T area and moisturize on the rest of your face).
OMG doesn't it look AMAZING!?!?! like it literally makes your skin look so glowy and healthy!!
So I was all excited and went onto eBay to look for it... then... I discovered a brutal fact...
THE SKIN79 BB CREAM CONTAINS ALOE!!!! AND I'M ALLERGIC TO ALOE!!!!!
T________________________________________________________T
why why why why WHY OH WHY OH WHYYYYYYYYYYY !!!!!!!!!!!!!!!!!!!!!!!!!!!!!!!!!!!!!!!!!!!!!!!!!!!!!!!!!!!!!!!!!!!!!!!
I'm just so sad now... T__T....
Friday, June 18, 2010
Bebe!
Hello people~! =)
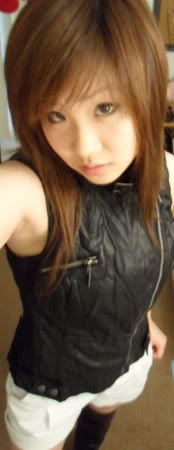
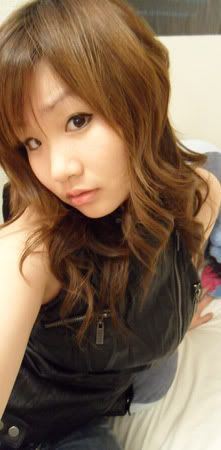
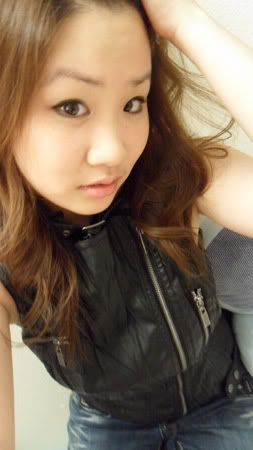
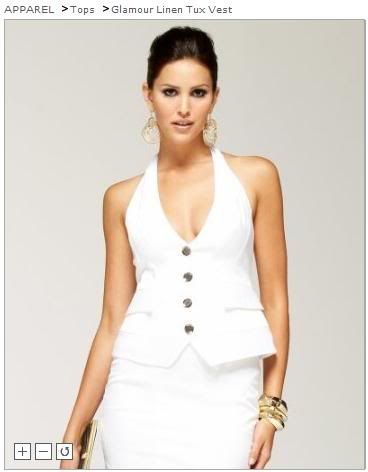
haven't done outfit posts in a long time... :P I got a vest from Bebe like last week?
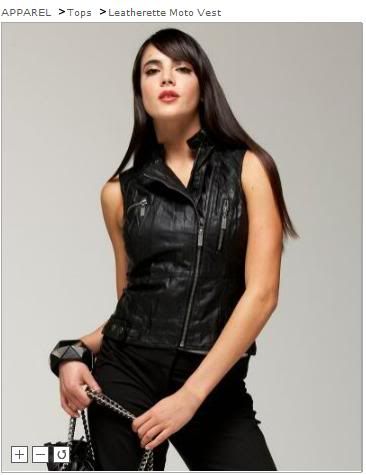
It's the "Leatherette Moto Vest"
So if you actually look it up this vest is quite pricey... -___- so I made sure I can wear it many ways XDD to make my money worth it... kind of? orz
But it is kind of versatile =)
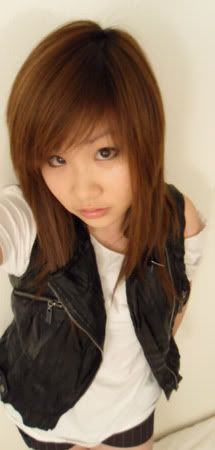
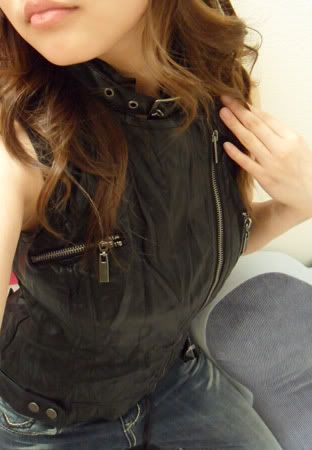
You can just wear the vest like this, leave it open
Excuse the awkward pose... XD
or this, still leaving it open but folding the front and neck
or zipped up with folded front
like so
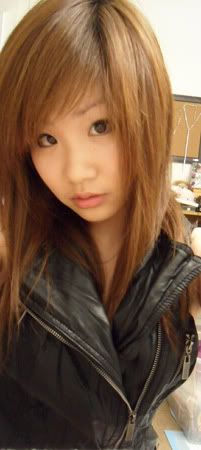
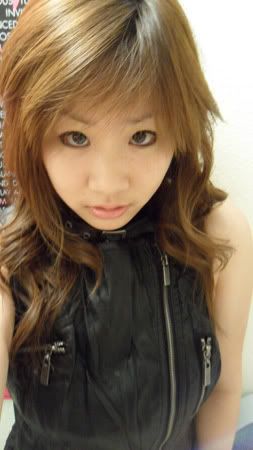
But my favorite wearing way... is zip it all the way up and fasten that little belt on the neck =)
And...
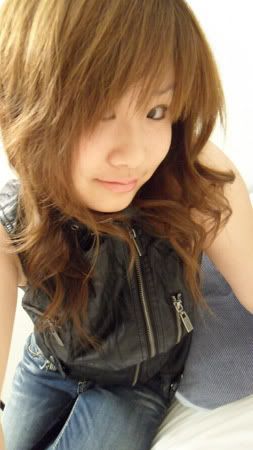
Please excuse me cam-whoring ahaha!
I tied my bangs up in this pic =P
See the belt thingy? I just love this vest =P
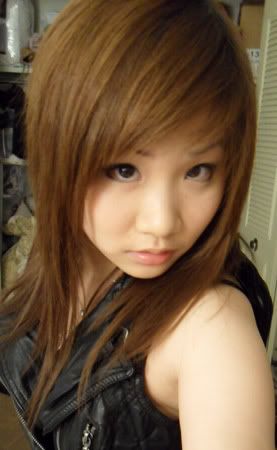
messy hair miao~
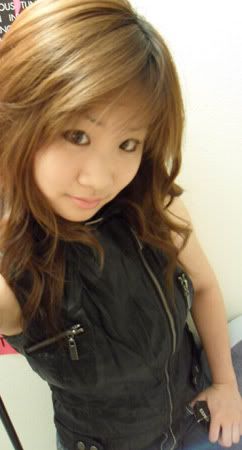
I rarely take pics from the front... haha you can see why now -__- I like the side of my face better lol!
LoL I was holding my bangs up cuz they were bothering me -__-
And and and...
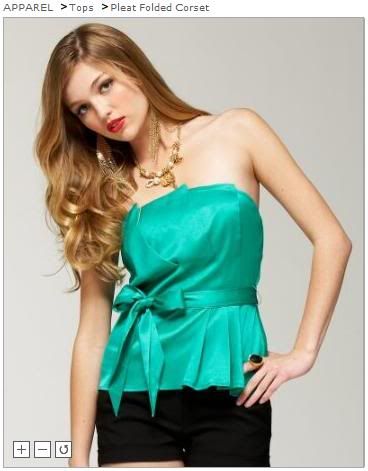
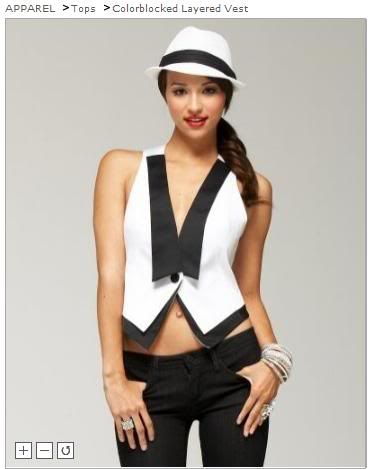
Other Bebe stuff I'm lusting after XD (too expensive though -__- so... I think I will just look no buy orz...)
I don't usually like bows but I really like this design =) not over-done cuteness
haha you can prob tell... I love vests
Miaoooo >__< I'm gonna try this one next time (but I won't buy it!! *keeps reminding myself* haha wayyy too much!)
This for some reason reminds me of the girlicious maniac outfit :)
AHH~~ why is Bebe so expensive!!! DAMMIT! lol
What stores do you guys like?? I love shopping at Forever 21... well mostly b/c they're more affordable, but they have a lot of cute stuff too :) but I need to stop shopping there cuz ALL my stuff are from there!! ahh!! LOL
Happy Friday~ ^__^
<3 Frances
Thursday, June 17, 2010
Kana Nishino Inspired Eyeliner
Hello hello! =)
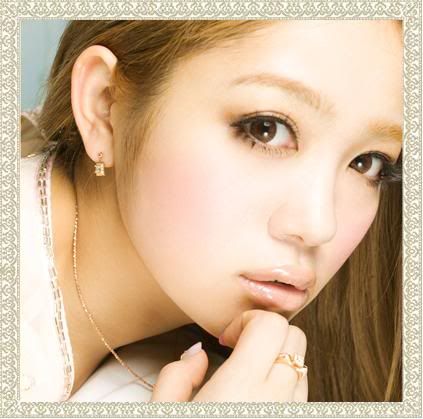
So this is a simple look inspired by 西野カナ, Kana Nishino =)
Who's Kana?
She's my current favorite Japanese singer :P (haha yes the same pic I used in the "Hat" entry)
She looks pretty with little makeup too in my opinion :) (aka minus all the lashes lol)
She recently released her new single "会いたくて 会いたくて (Aitakute Aitakute)" if you're interested definitely check it out :)
other recommended songs:
- Brave Heart (feat. NERD HEAD)
- もっと...
- Dear
- 遠くても
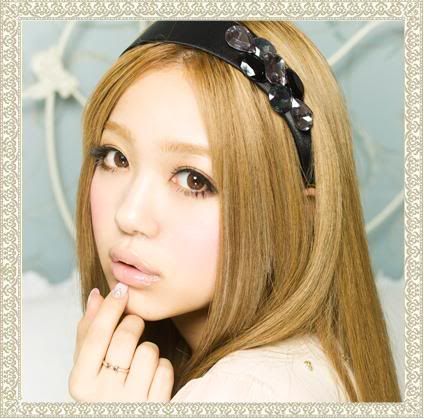
(I LOVE this hair color! Very ashy :) )
So her eyeliner in these pics caught my eye:
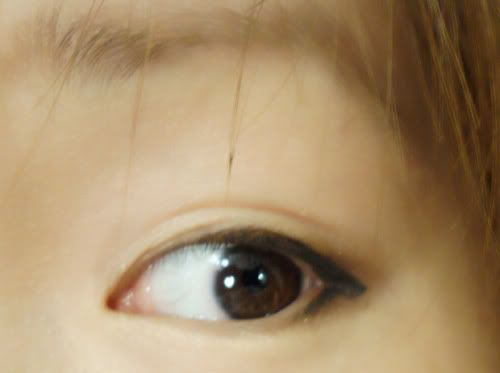
This one is the best pic of her eyeliner and this is the pic I was basing off of :) of course the makeup doesn't look that much like hers (obviously I'm not her and don't have the her eye shape) and she prob didn't even use eyeliner; that black line might simply be from the stem of the false lashes. But that's what inspired me :)
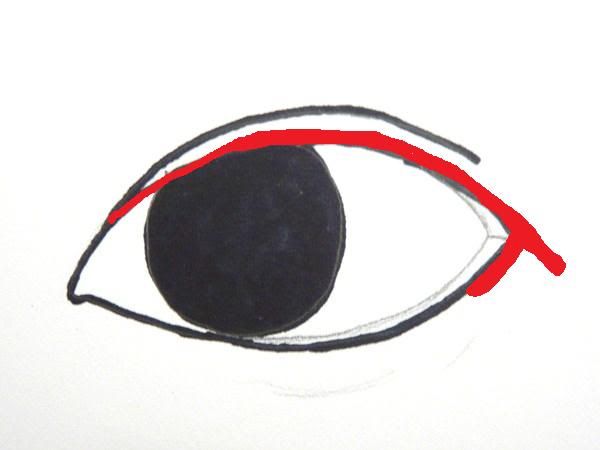
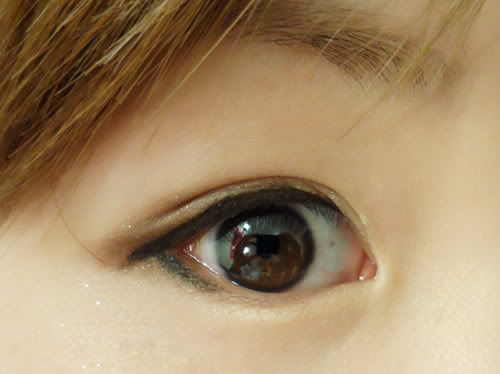
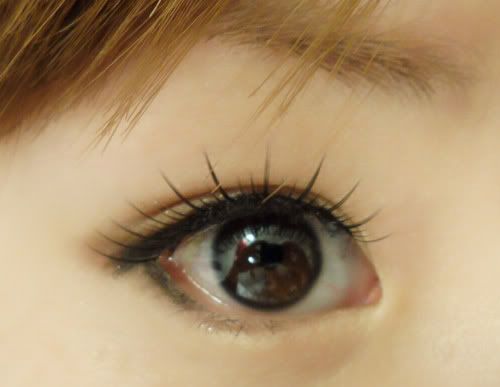
So I didn't do anything elaborate on this look. I simply did this eyeliner without all the false lashes (sort of replacing lashes with eyeliner) I only wore upper lashes but you don't even have to. If you want to take it to the next level you can make your own lower lashes or buy some similar ones from Koji (I think the Dolly line). I think this eyeliner look is adorable and I didn't do the lower lashes simply because I want to show without the lashes this look is cute too ^__^ and more wearable (and of course because I'm lazy MUAHAHA XD)
So let's start!
Map:
(ps. I already applied some brown eye shadow on the outer corner)
Super simple yes? XD
Easiest tutorial ever XD *kick fly* not even a tutorial... just an eyeliner variation XD
Hope you guys like it :)
<3 Frances
Subscribe to:
Posts (Atom)